A quick intro to Tungsten
This is one of our quickies in our Prep series. This piece is on Tungsten definition, selection, and prep. It is a mild intro that will be followed up later in another portion of the Prep series.
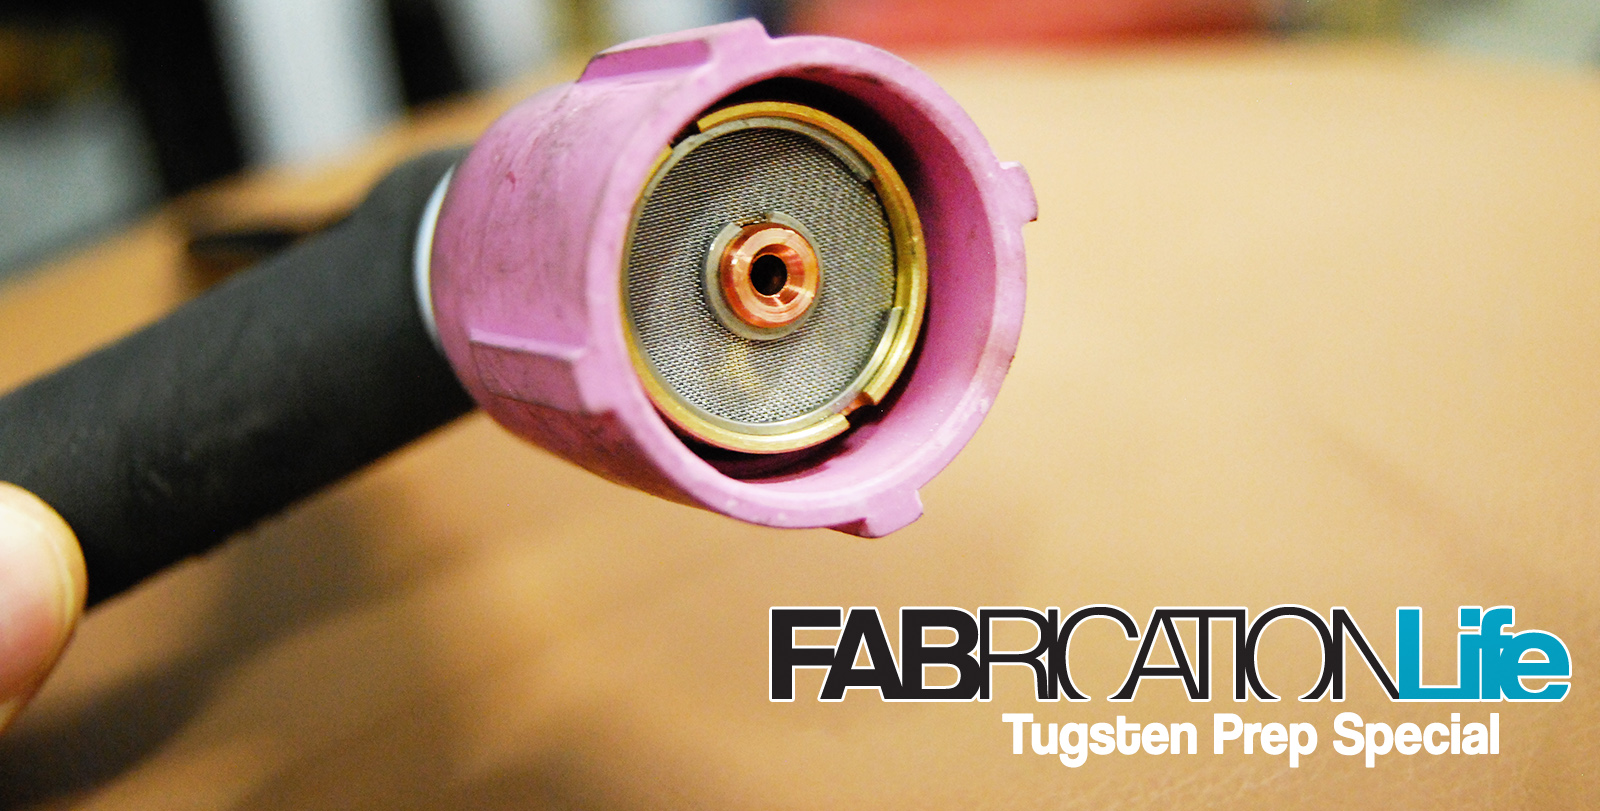
What is the tungsten?
It’s the tungsten electrode that protrudes from the hand torch that channels the arc to the base metal that the ground clamp is clamped to.
Cool! So what about it?
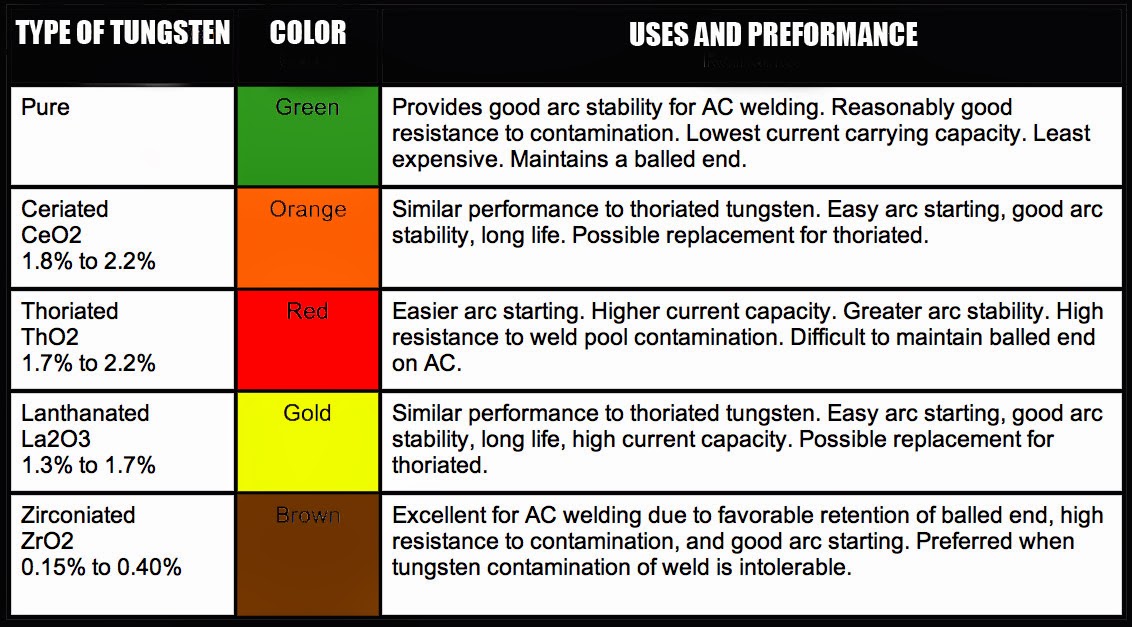
Well it comes in a variety of offerings from pure tungsten, to ceriated, thoriated, lanthanated, zirconiated and rare earth. All of which have their own pros and cons, but typically I like rare earth and Thoriated due to their abilities to be used on a variety of metals, have great current capacity and arc stability.
Alllllllllllrighty then! Now that I selected the one I want, now what?
Well then select your size. Typically recommend running a 3/32” diameter as it’s a good starting ground and can easily handle amperage up to about 125-150A with minimal erosion. Once you are steady in that region of amperage, switch to a 1/8”.
Once you’ve settled in on the size tungsten, then get a matching collet body to hold it in place to the torch and select weather you want a gas lense or a traditional lense. A gas lense allows for more gas flow and thus is preferred my most industry fabricators for excellent coverage and good looking dimes.
Then select what cup you are going to run. Typically, the industry standard is around a 10 or 12 with a lense.
Now that you have your torch setup, it’s now time to prep the tungsten.
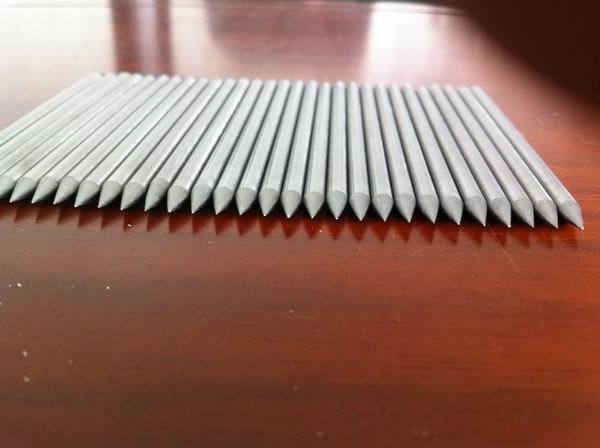
Always have a dedicated grinder wheel and/or tools to keep the tungsten clean of debris and cross contamination. This is a essential for good weld quality. You will want to sharpen the tip of it on the grinder going against the bench grinder’s wheel’s motion. The tip should turn out like a fine sharpened pencil point after being in a pencil sharpener. No jagged edges or flat spots. Continuously turning it during the grinding process is essential. Also, grind it for 1-3 seconds, and cool it in a small cup of water. Then proceed to go back to grinding. Cool in water and repeat until the point is to your liking. Remember, the finer the point, the more concentrated the arc will be and your puddle will be more narrow. So reshaping that to be more fine pointed might work very well on a file repair while a quick taper in might be better for a larger spanned pass area.
Some people will take the prep one step further and gently buff the grinded area with a scotch brite pad too. Again, it’s all personal preference. Stay tuned for our next entry on Tungsten, coming soon.
If you have missed out on our Prep and How-To’s, here is a quick look back:
This is just the start of a small series we are doing on Tungsten for beginners. We have a few more coming in this series. Stay tuned to FabricationLife.com and check the main page for more updates!
A quick thank you to Dezod Motorsports for this quick selection.


